How can you change an expiry date and recharge ink level on the original Mimaki ink chips?
- Lfp-repair-service
- Mar 7, 2021
- 3 min read
This is one of the most common questions you can find on numerous industry forums. And the second important question people ask - will my printer still have a warranty if I set up these parameters? In this article I will address these questions, so you’ll get a clear idea about the process.
First, let’s see how you can baypass ink expiry date problem and top up an ink level. In fact, you can do it in two ways – by using so-called permanent ink chips, or alternately, resetting original Mimaki ink chips, which you have in your printer.
If you prefer to go the first way and purchase permanent ink chips for your Mimaki printer, you have to know that your printer will no longer be on the warranty. Using ink chips from any supplier besides Mimaki, will cost you a warranty. The other thing you have to be aware of is that the permanent ink chips have an expiry date. Don’t be confused with the name “permanent ink chips”– they last 6, 12 or 18 months, depending on manufacturer. After that period, you have to purchase them again. I don’t want to say that permanent ink chips are bad – some people use them, however those are things you have you be aware of, if you’re going to use them.
The second way is using of your original Mimaki ink chips, that you already have, and reprograming them according to your needs.
In this case you are not losing your warranty, which is good thing for those who have relatively new equipment. The other benefit is that you can use one Mimaki chip resetter unlimited times and for different printer models.
Let’s see how you can reset different parameters by using Mikachip – the latest Mimaki ink chips programmer on the market.
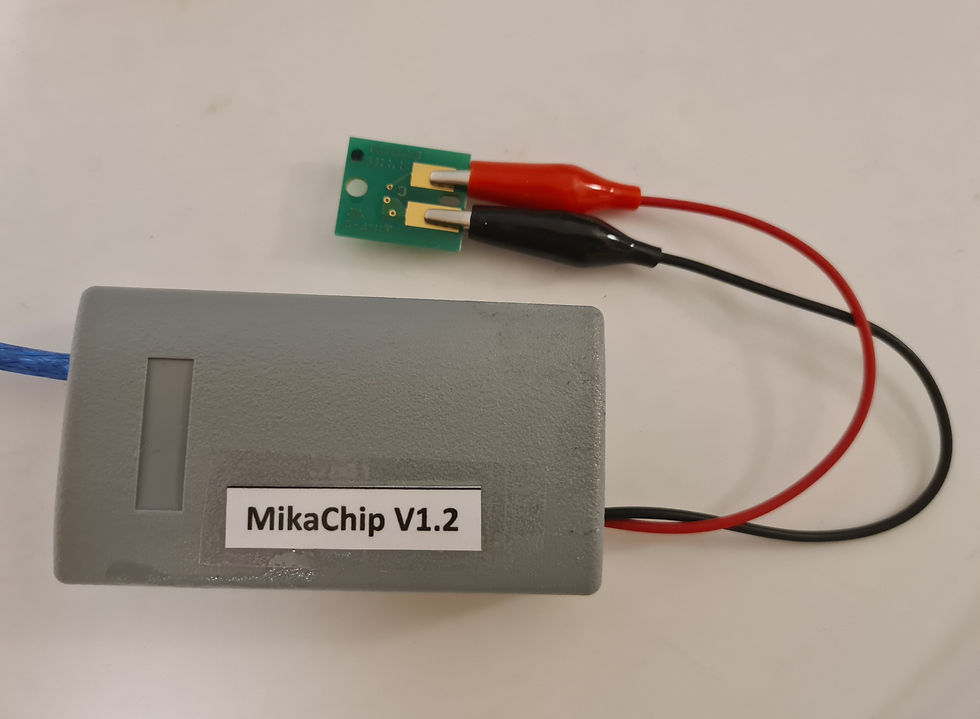
First, what’s Mikachip? – this is ink chips resetter that incorporates an easy-to-use software and physical device. In this article I want to review all the parameters you can set up using Mikachip.
Let’s start with such important parameter as toping up the ink level. If you need to select this parameter, just tick the Recharge Ink Level box and you will be able to top reset the ink level to desired amount (50%, 70% or 100%).

Next important parameter is an Expiry date. If you need to change an expiry date of the ink chip, you need to tick the Increase Expiry Date box. It will automatically extend the duration of the ink chips for 3-6 months.

To change the colour on the ink chip you need to tick the Change Colour box. Then you will have an option to choose from. Select the colour you need, so new colour will be written on chip.

The Set Colour submenu items.

If you need to change the ink type, you need to tick the Change Ink Type box. You will see a list of ink types available, so you can select the type that suits your needs.

The Ink Type submenu items

Now let’s see which printer models the Mikachip supports. You need to select from drop down menu the Select Printer Model tag. You will see a list of models, that Mikachip works with - JV33, CJV30, JV5, TX400, TS3, JFX, UJF, UJV, SWJ, Fuji Acuity LED 1600R, Fuji Acuity LED 1600 II and some other models.

When all parameters set up in the software, you need to use the physical device to reprogram the chips. It has USB cable to be plug in to your computer.
Connect the black connector to the long plate, and the yellow connector to the short plate on the ink chip.

You need to click on the Read from chip button to get information from your chip.

The next and the last step is programming. Click the Program chip button to write all selected parameters on the chip.

Upon a successful completion you will see a notification Success. Now you can use you ink chips as usual. And you can program them as often as you need.
コメント